Using the Bot Builder
Describe a feature in plain English. The builder writes the code, tests it, and puts it live on your bot.
How the builder works
Open the Bot Buildertab on your bot's page and describe what you want. The builder confirms you're ready, writes and tests the code, and publishes it to your bot. If your bot is already running it keeps answering your members the whole time. When you press Done, your changes go live.
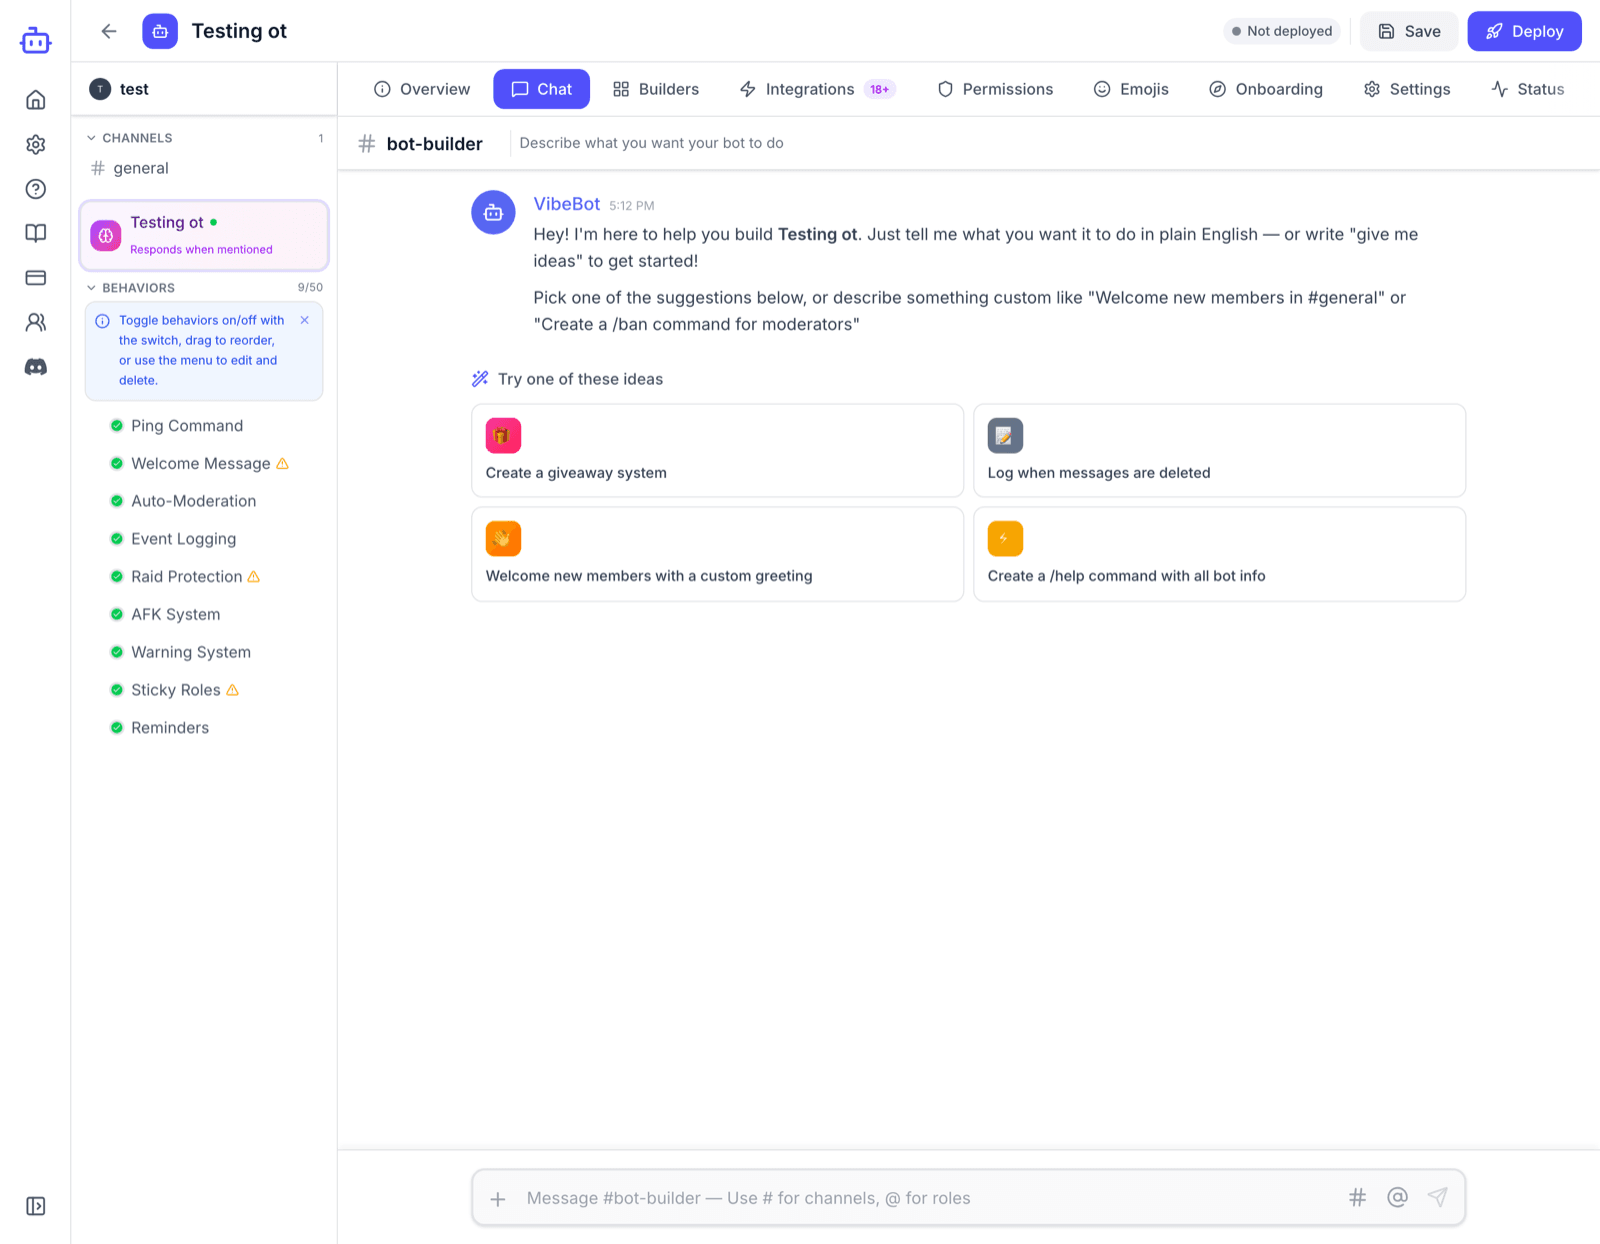
Building does not take your bot down
Basic Syntax
Write as you would speak. The builder reads channel names (#channel) and role references (@role) from your connected server.
Channel References
Use #channel-name to reference Discord channels
Send a message to #generalRole References
Use @role-name to reference Discord roles
Give them the @Member role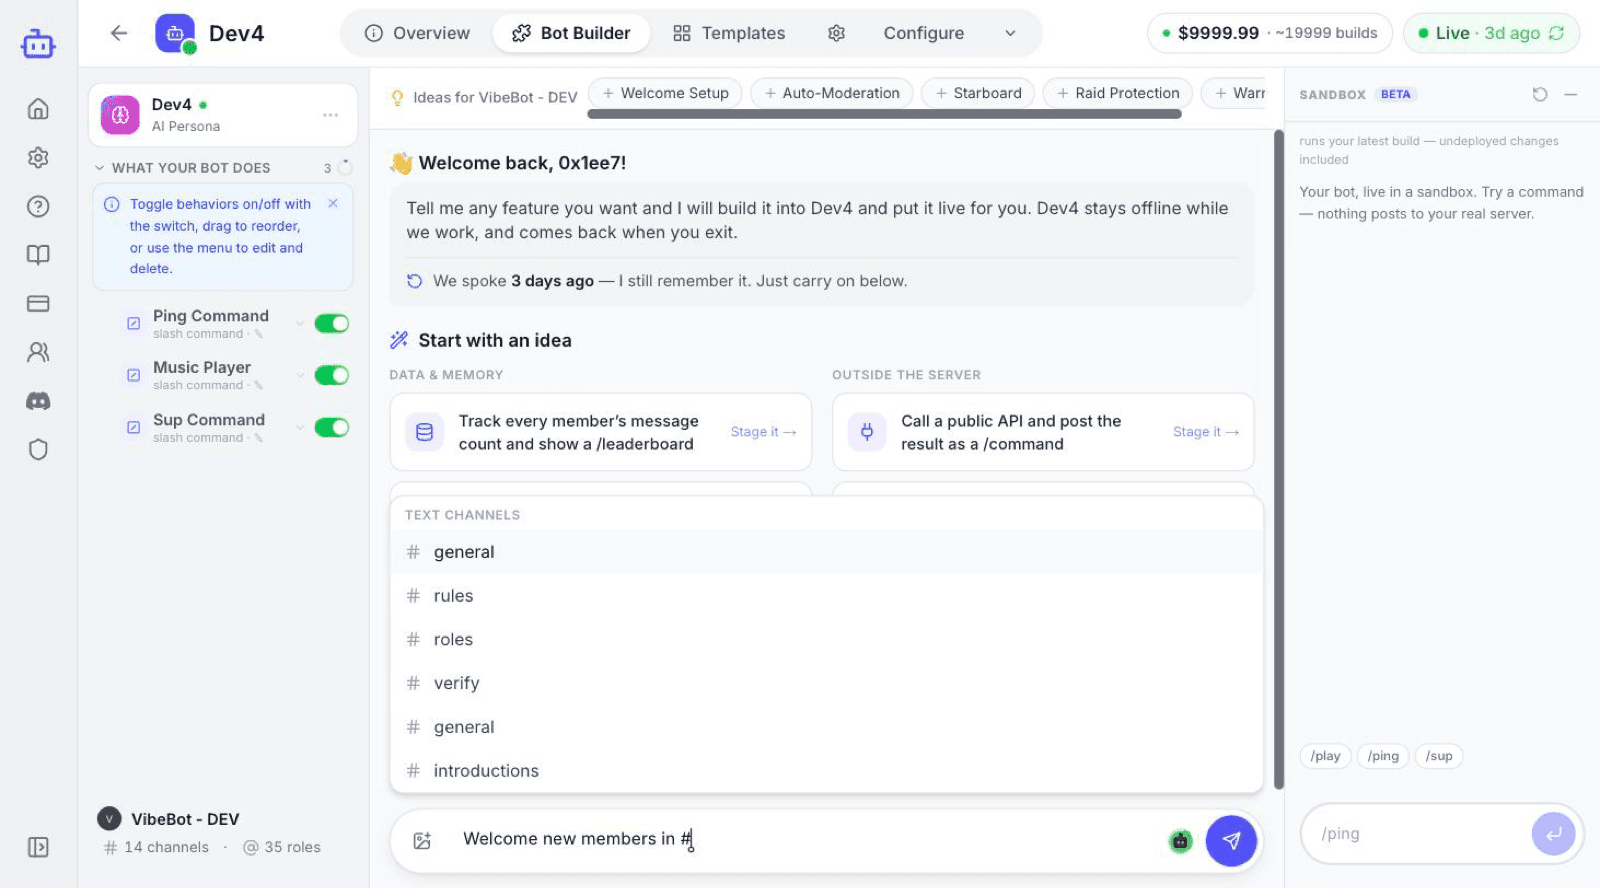
Connect your server first
Example Prompts
These are the same starting points the builder suggests. Copy one and adapt it, or describe something entirely your own:
Track every member’s message count and show a /leaderboardGive members XP for chatting, with levels and rank-up rolesCall a public API and post the result as a /commandPost a scheduled message every morning, on a real timerA ticket system with a claim button and a transcript on closeA form that asks a few questions, then posts a formatted embedTips for Better Prompts
Be Specific
The more details you provide, the closer the first build lands to what you meant.
❌ Vague:
Make a welcome bot✅ Specific:
When someone joins, send "Welcome [username]!" to #welcome and give @Member roleAnswer the questions it asks
When something is ambiguous — which channel, who is allowed, what the message should say — the builder asks before it ships and waits for your answer. Answering in one message keeps the build moving.
Use Actual Names
Reference your actual channels (#general) and roles (@Member) from your server.
Mention Permissions
If a command should be restricted, specify which roles can use it.
What happens while it builds
Each piece of work shows up as a run you can open. A run folds its steps under plain labels — reading your bot, checking for problems, reading your bot's logs, publishing to your bot — so you can see what it did without reading code.
Changes go live when you press Done
When the builder finishes a feature, it saves it. Press Done, and your changes go live. You can also press Put them live now in the chat. Then the chat stays open. You do not need the Put live button in the header for builder work.
Every run shows its cost
Each run displays its step count and price as it goes, and the banner keeps a running total for the session, so there are no surprises on your balance.
It remembers the conversation
Come back tomorrow and the builder still has the context. Carry on where you stopped — no need to re-explain what it built last time.
Good to know
- Builder runs spend credits. Check your balance before a big build.
- Split very large asks into a few smaller ones — each lands and goes live sooner.
- If it built the wrong thing, ask for the change in the same conversation — it remembers what it built.
- The Undo history panel restores ready-made features from Templates; for anything the builder wrote and published, ask the builder to change it.
About Builder Credits
The builder bills by token usage: $7.50 per 1M input tokens and $37.50 per 1M output tokens. Cost varies with how much work a run does — the run shows its own price, and the banner keeps a session total. Your plan includes a credit allowance:
- Trial: free for 3 days, includes $1 in credits
- Lite ($5/mo): one $5 credit at signup, no monthly credit
- Pro ($10/mo): $10 in credits each month
Pro and Lite can enable auto-reload, which adds $10 when your balance drops below $2.00. See How Credits Work for typical costs.
Tip: Templates never spend credits. Use them for common features and save the builder for custom ones.